
Hey Y'all!
I am joining other demonstrators from all over the globe to share with you what I think is one of the "coolest" suites available! I had so much fun creating these projects to share with you today.

The first card I am sharing is a shaker card...in fact, when I saw this shaker technique, my mind was blown!

The shaker element is a clear envelope! And it is so easy to do. To make this type of shaker card, cut a piece of DSP to 3-3/4 x 5 and place inside the envelope along with the shaker pieces. Seal the envelope, wrap around the edges of the DSP and adhere to the back. Then adhere to your cardbase.
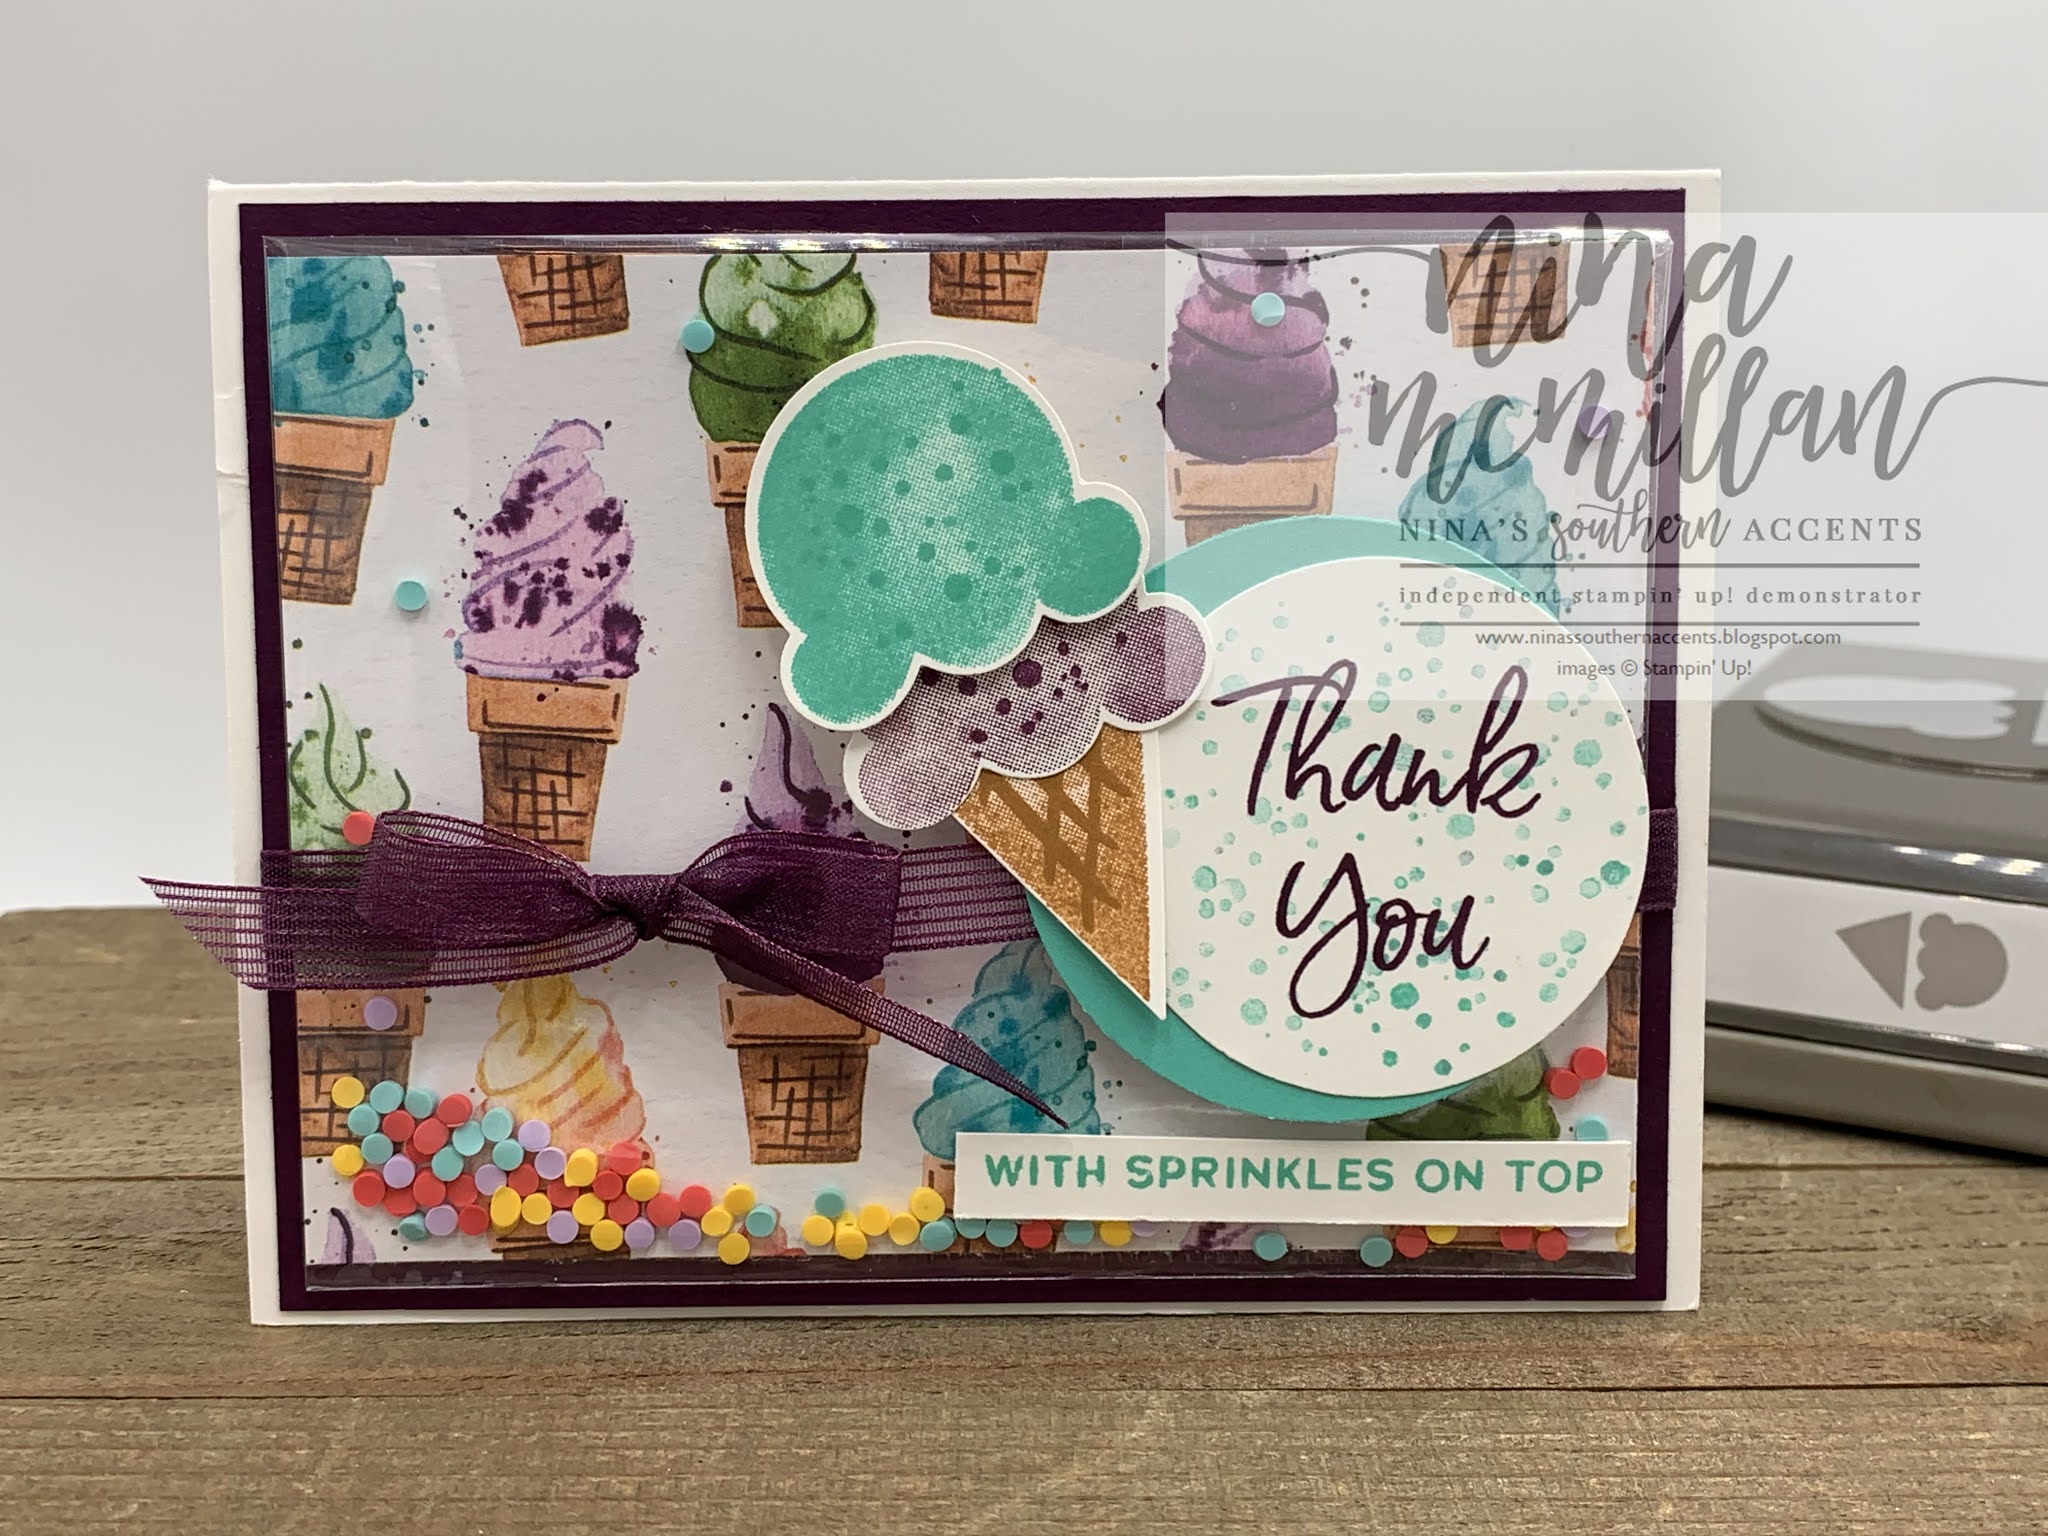
I used a Thick Basic White cardbase cut 5-1/2 x 8-1/2, scored at 4-1/4, then added a Blackberry Bliss layer measuring 4 x 5-1/4. I adhered the shaker element to this layer, then wrapped some of the Blackberry Bliss ribbon around it before attaching to the cardbase. I punched a 2-1/4" Coastal Cabana circle and 2" Basic White that I stamped my sentiment on. I added the ice cream cone I had stamped and punched to finish off the card.
Tip: Create lighter shades of ink from the same ink pad by "stamping off" on a scrap piece of paper before stamping onto your project. This is how I stamped the scoops of ice cream, I stamped off first, then stamped the "dots" full strength.
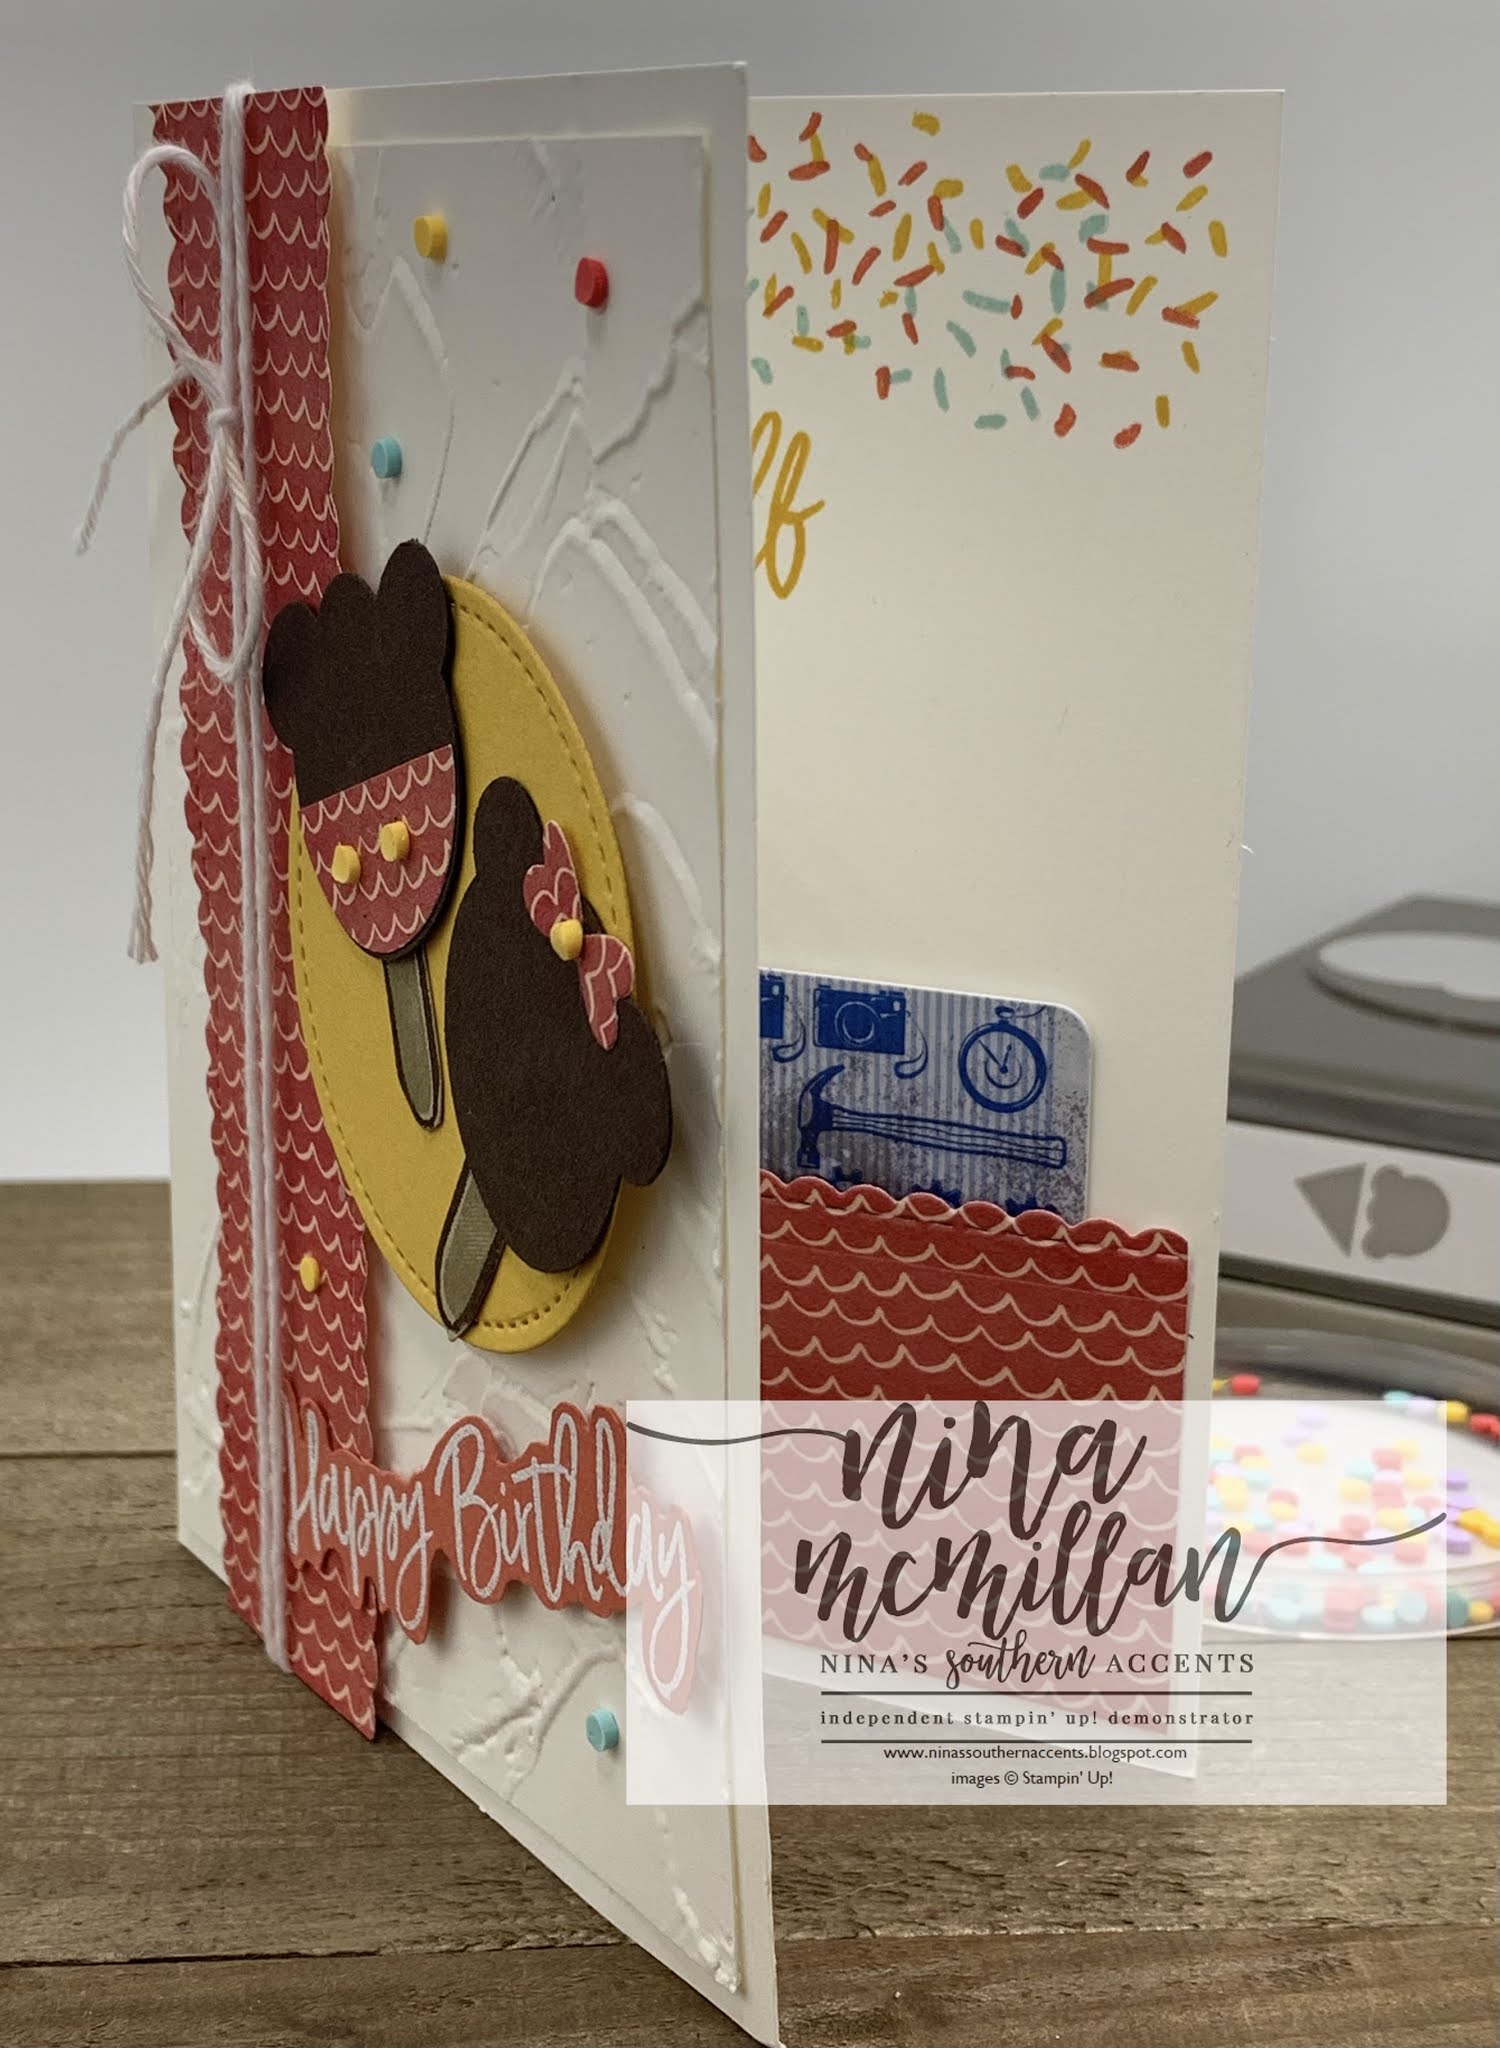
I CASE'd the idea for this next project from another demonstrator, Breelin Renwick. It was so cute I just had to share the idea.

Mickey and Minnie Ice Cream Bars!

I used DSP from this suite to create the shorts and bow (the bow is made from 2 die cut hearts from the Stitched Be Mine dies.) I also used one of these dies to create the scalloped edges.
Tip: The Take Your Pick tool was so handy to add those sprinkles! One of the tools in my craft room I wouldn't want to live without!


 Circle Punch")
 Circle Punch")


Love your cards!!!!!Thanks for sharing
ReplyDeleteThank you!
DeleteSo stinkin' cute! I have GOT to make a Mickie & Minnie card! Love them! Thanks for sharing.
ReplyDeleteLove them! That Disney one is SO stinkin' cute!!
ReplyDeleteOMG love the mickey/minnie ice cream bars
ReplyDeleteHi Nina, what a clever idea to make mickey/minnie bars. Thank you for sharing.
ReplyDelete