Showing posts with label Good Morning Magnolia. Show all posts

Saturday, February 22, 2020

A Very Special Birthday Card & Double Easel Fancy Fold


Hey Y'all! 
I wanted to share this very special card with you today.  I made it for my "Aunt Madeline" who is really my cousin.  She and my mom are Double First Cousins--sisters married brothers--today is her 100th birthday, and I am getting ready to go party with her, so I've got to get moving!
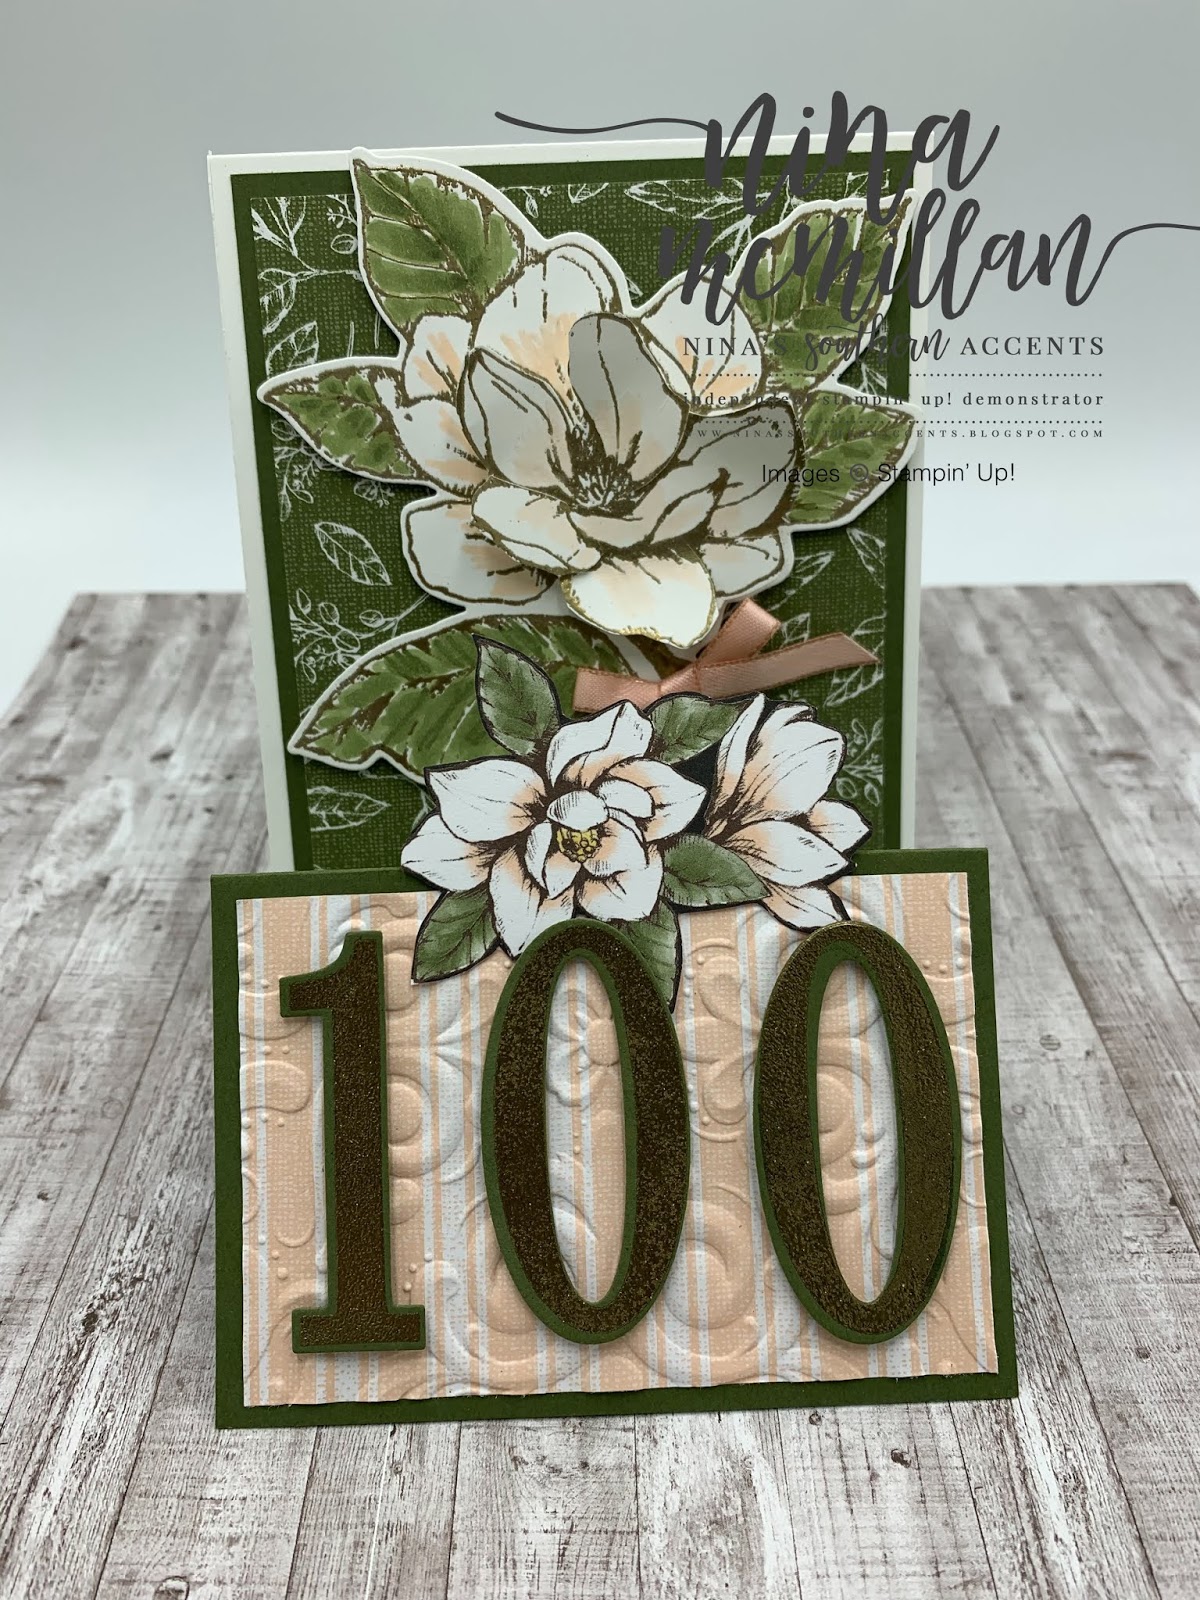

I decided on this Double Easel Fancy Fold to showcase that stunning magnolia...you know us southerners love our magnolias. I followed the measurements from TX Stampin' Sharon (Sharon Armstrong), a fellow demonstrator.  She made a wonderful YouTube video showing how to do one of these.
The fold itself is very easy.  You just start with a top folding card base (4-1/4 x 11, scored at 5-1/2), then add another piece of card stock, I chose Mossy Meadow cut at 4 x 10⁻¹/4, scored at 2-3/4 and 5 on the 10-1/4 side.  You will also need 2 pieces of DSP, one 3-3/4 x 5, and one 3-3/4 x 2-1/2.  These designs were from the Magnolia Lane DSP.


 I dug out a retired set, the Number of Years stamp set and Number framelits and gold embossed the 100 onto Mossy Meadow.  I also gold embossed the large magnolia stamp twice, and cut out the center of one and popped it up on top of the other one to add dimension. I used Stampin' Blends to color the large magnolia.  I also fussy cut a bloom from the DSP to add an accent to the bottom fold.

What is a special card without a special envelope?  I used the Parisian Flourish 3D Embossing folder for the design on the striped DSP, I love how that added to the look!  


And here she is, the lady of the hour!  Happy Birthday Aunt Madge!  I hope you enjoyed your day, you are so loved by so many, and we are so thankful to get to celebrate 100 years of living with you! 
And thank you for stopping by, if you are interested in purchasing any of the products used, just click on the images below to go to my online store.  
Love,
Nina 


Product List

Tuesday, June 11, 2019

Diamond Easel Fancy Fold


Hey Y'all!
So I did a thing, a fancy thing! A "knock your socks off" kind of thing...I made a Diamond Easel Fancy Fold Card!  I felt so intimidated, but then I tried it and it was so stinkin' easy!  I CASE'd the Magnolia Card from Susan Levasseur of WOW NOLA Creations.  I watched her YouTube video andshe made it so simple.            

                                      
This fancy fold just puts that beautiful magnolia in the spotlight.  
The dies in this set have pieces to make this 3D magnolia flower.  I sponged the edges with Soft Suede, the petals with Petal Pink, and added a rose from the Bird Ballad Trinkets.
I loved this fold so much, I decided to CASE myself! 


I created this card for my son for his 29th birthday.   I did use some newly retired product-the Tranquil Tide cardstock and Tranquil Textures DSP, but I am sure you could find something in your stash to use.  The new In Color-Pretty Peacock-is pretty close to Tranquil Tide.


If you don't have the Well Said stamp set and Well Written framelits, you need to get them TODAY!  You can make a card for pretty much any occasion!

I love how both of these cards turned out!


You do need to make a 6x6 envelope for this card, it is not a standard card.

Tips & Tricks:
  • Card Base-6x12, score on 12" side at 3" and 6".  Place a small mark at 3" on the edge of the 6" side, make a diagonal cut from that mark to the first score line.  Fold the card in 1/2 (on the 6" score line) and diagonally cut that end as well.  Both ends should be the shape of a triangle.
  • Layers: I used 2 colors of cardstock for each card.  I will tell you what the measurements are for the Best Catch Card to make it simple.  Basic Black-2 pieces 4 x 4, 2 pieces 5-3/4 x 2-3/4, 1piece 2-3/4 x 2-3/4 (cut in 1/2 diagonally)
  •  Cajun Craze-5-1/2 x 2-1/2, 2-1/2 x 2-1/2 (cut in 1/2 diagonally)
  • DSP 2 pieces 3-3/4 x 3-3/4
  • Whisper White 5-1/2 x 2-1/2
  • Get great results coloring with watercolor pencils and blender pens, also use your blender pens to spread color after inking (see basket on Best Catch card)
  • I added brown to the cattails by partially cutting early espresso and piecing it on the Tranquil Tide die cut
Thanks for stopping by today!  If you would like to purchase any of the products used, please click on the links below to go to my Online Store.  Please use the current host code found in the right column.  
Make sure you are subscribed to my blog so you don't miss any inspiration!  Leave a comment below and tell me what your favorite new product in the 2019 Annual Catalog is!  I want to know!
Love,
Nina

Product List