Showing posts with label Gift Ideas. Show all posts

Saturday, October 1, 2022

A Gift Idea For Stampin’ for the Christmas Blog Hop


Hey Y'all!


I'm so glad I'm getting to join in with my friends for the Stampin' for Christmas Blog Hop! We have been bringing you projects every month to inspire you and, hopefully, keep Christmas from sneaking up on you. Have you CASE'd any of the projects we've shared? I would love to know!
The project I am sharing today is a set of notecards in a box, and they are so easy to make! 


I've used the Kraft Note Cards & Envelopes, along with the Celebrate Sunflowers stamp, the Forever Fern stamp, and the Lovely & Lasting bundle. I used Fall colors for my project, but it can be adapted to use whatever stamps and colors you wish.


The cool thing about this project is that you make your own DSP! The card fronts come from 1 sheet of cardstock!


To make the card fronts, stamp your images in a "cross" pattern in the center of the cardstock, then use your Paper Trimmer to cut the cardstock in quarters to make 4 pieces 4-1/4 x 5-1/2. You will trim these down to make card fronts. You can get 4 A2 size card fronts by trimming the panels to 4 x 5-1/4,  but since I used notecards, I trimmed 2 of the panels to measure 3-5/8 x 4-7/8, and I cut 2 of them down to 4-1/4 x 2-3/4, using a leftover piece to decorate the front of my box.

I used Rich Razzleberry cardstock to make my box, and stamped Tone on Tone images to give it some texture. Here are the measurements for the box:
  • Rich Razzleberry 3-1/2 x 9-1/2, score on the long side @ 3-3/4, 4-1/2, 8-1/4, & 9 (this makes the inner box to hold the cards)
  • Rich Razzleberry 3-3/4 x 10, score on the long side @ 5-1/4 & 6 (this makes the outer cover that wraps around the box)
Thanks for stopping by today! Make sure to check out all of the other neat projects everyone is sharing...Who's ready for Christmas?


If you live in the US, do not have a current Stampin' Up! Demonstrator, and would like a copy of the catalog, email me at ninassouthernaccents@gmail.com with "Catalog Request" in the subject line, and I will be happy to send you one!



Do you love Stampin' Up! products? Have a long wish list? Become a happy shopper and purchase from yourself at a discount, or even build a business. I would love for you to join my Southern Accents Stampin' Squad, and no! you don't have to have a Southern Accent lol! Click here to sign up.

Love,
Nina


Saturday, February 5, 2022

A Cute Stocking Stuffer-Stampin' For Christmas


Hey Y'all!
The Stampin' For Christmas crew are back with our first hop of the new year, YAY! You may have arrived from the lovely Gez Carpenter, or, if you are starting here with me, Welcome! If you are like me, your craft room may or may not be recovering from Christmas 2021 (ha! ha!) And how many of you have that stack of DSP (Designer Series Paper) that you had such high hopes for, but ran out of time? No, I haven't been spying on you....I'm a crafter, too, and I know how things work!


I am here to help! These Nail File wraps are quick and easy to make! They use a 6x6 piece of paper, so whatever you have, 12x12 or 6x6, it will work. Kaye at Papercraft Skies is where I saw the original design, you can watch her video here
.

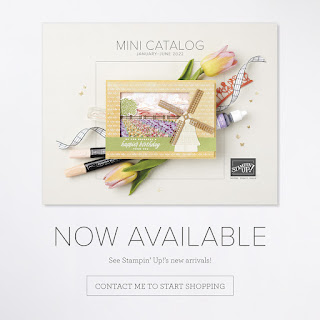
I have used a sentiment from Poinsettia Petals and the coordinating Poinsettia Dies to create the flower. The flower is cropped from the Mother of Pearl Specialty Paper in the new January-June Mini, and the center was created by coloring an Iridescent Rhinestone, also found in the new Mini, with my dark Cherry Cobbler Stampin' Blend. 

Tip: Pick up embellishments with the putty end of the Take Your Pick Tool and place on your project.


Here are the step-by-step instructions to make the wrap:

First, score a 6x6 piece of DSP or cardstock at 1-1/2, 3, & 4-1/2
Fold and burnish score lines with your bone folder and continue to burnish each fold you make.


Fold the top right corner so the edge lines up with the far right score line.


Fold the top left corner to the second score line.


Fold the bottom left corner to the first score line.


Place adhesive along the bottom edge of the right panel to close the bottom of the pocket. Fold the right edge along the last score line. Fold the left edge along the middle score line.


Wrap the flap around to the back and secure with adhesive.
See how easy! These could be made for all occasions-Christmas stocking stuffers, Easter Basket fillers, Loaded Envelopes (check out my Valentine's Loaded Envelope!) We are making them for a favor for a Women's event at our church. And they don't have to contain a nail file...they can hold pencils, pens, even bone folders (hey, hey...team gifts!)
I am so glad you stopped by today! I hope we are getting those creative wheels turning, now hop over to Annette Elias for more inspiration! 

Please leave a comment and let me know how you liked this project, also let me know what you would put in them!


Live in the US and don't have a current Stampin' Up! Demonstrator? I would love to be your demonstrator! Need a catalog? Email me at ninassouthernaccents@gmail.com with CATALOG REQUEST in the subject line.


WANT TWO FREE STAMP SETS?
Saleabration is a great time to become a demonstrator! The Starter Kit is ALWAYS the best deal in the catalog, but it's even better during Saleabration! Get $125 of products, for only $99, PLUS 2 FREE STAMP SETS OF YOUR CHOICE! I would love for you to join my Southern Accents Stampin' Squad, and no! you don't have to have a Southern Accent lol! Click here to sign up!


Thanks for stopping by today, go make something beautiful!
Love,
Nina