Showing posts with label Ice Cream Corner Suite. Show all posts

Friday, April 2, 2021

Ice Cream Corner Blog Hop


 Hey Y'all!

I am joining other demonstrators from all over the globe to share with you what I think is one of the "coolest" suites available! I had so much fun creating these projects to share with you today.

The first card I am sharing is a shaker card...in fact, when I saw this shaker technique, my mind was blown! 

The shaker element is a clear envelope! And it is so easy to do.  To make this type of shaker card, cut a piece of DSP to 3-3/4 x 5 and place inside the envelope along with the shaker pieces.  Seal the envelope, wrap around the edges of the DSP and adhere to the back.  Then adhere to your cardbase.
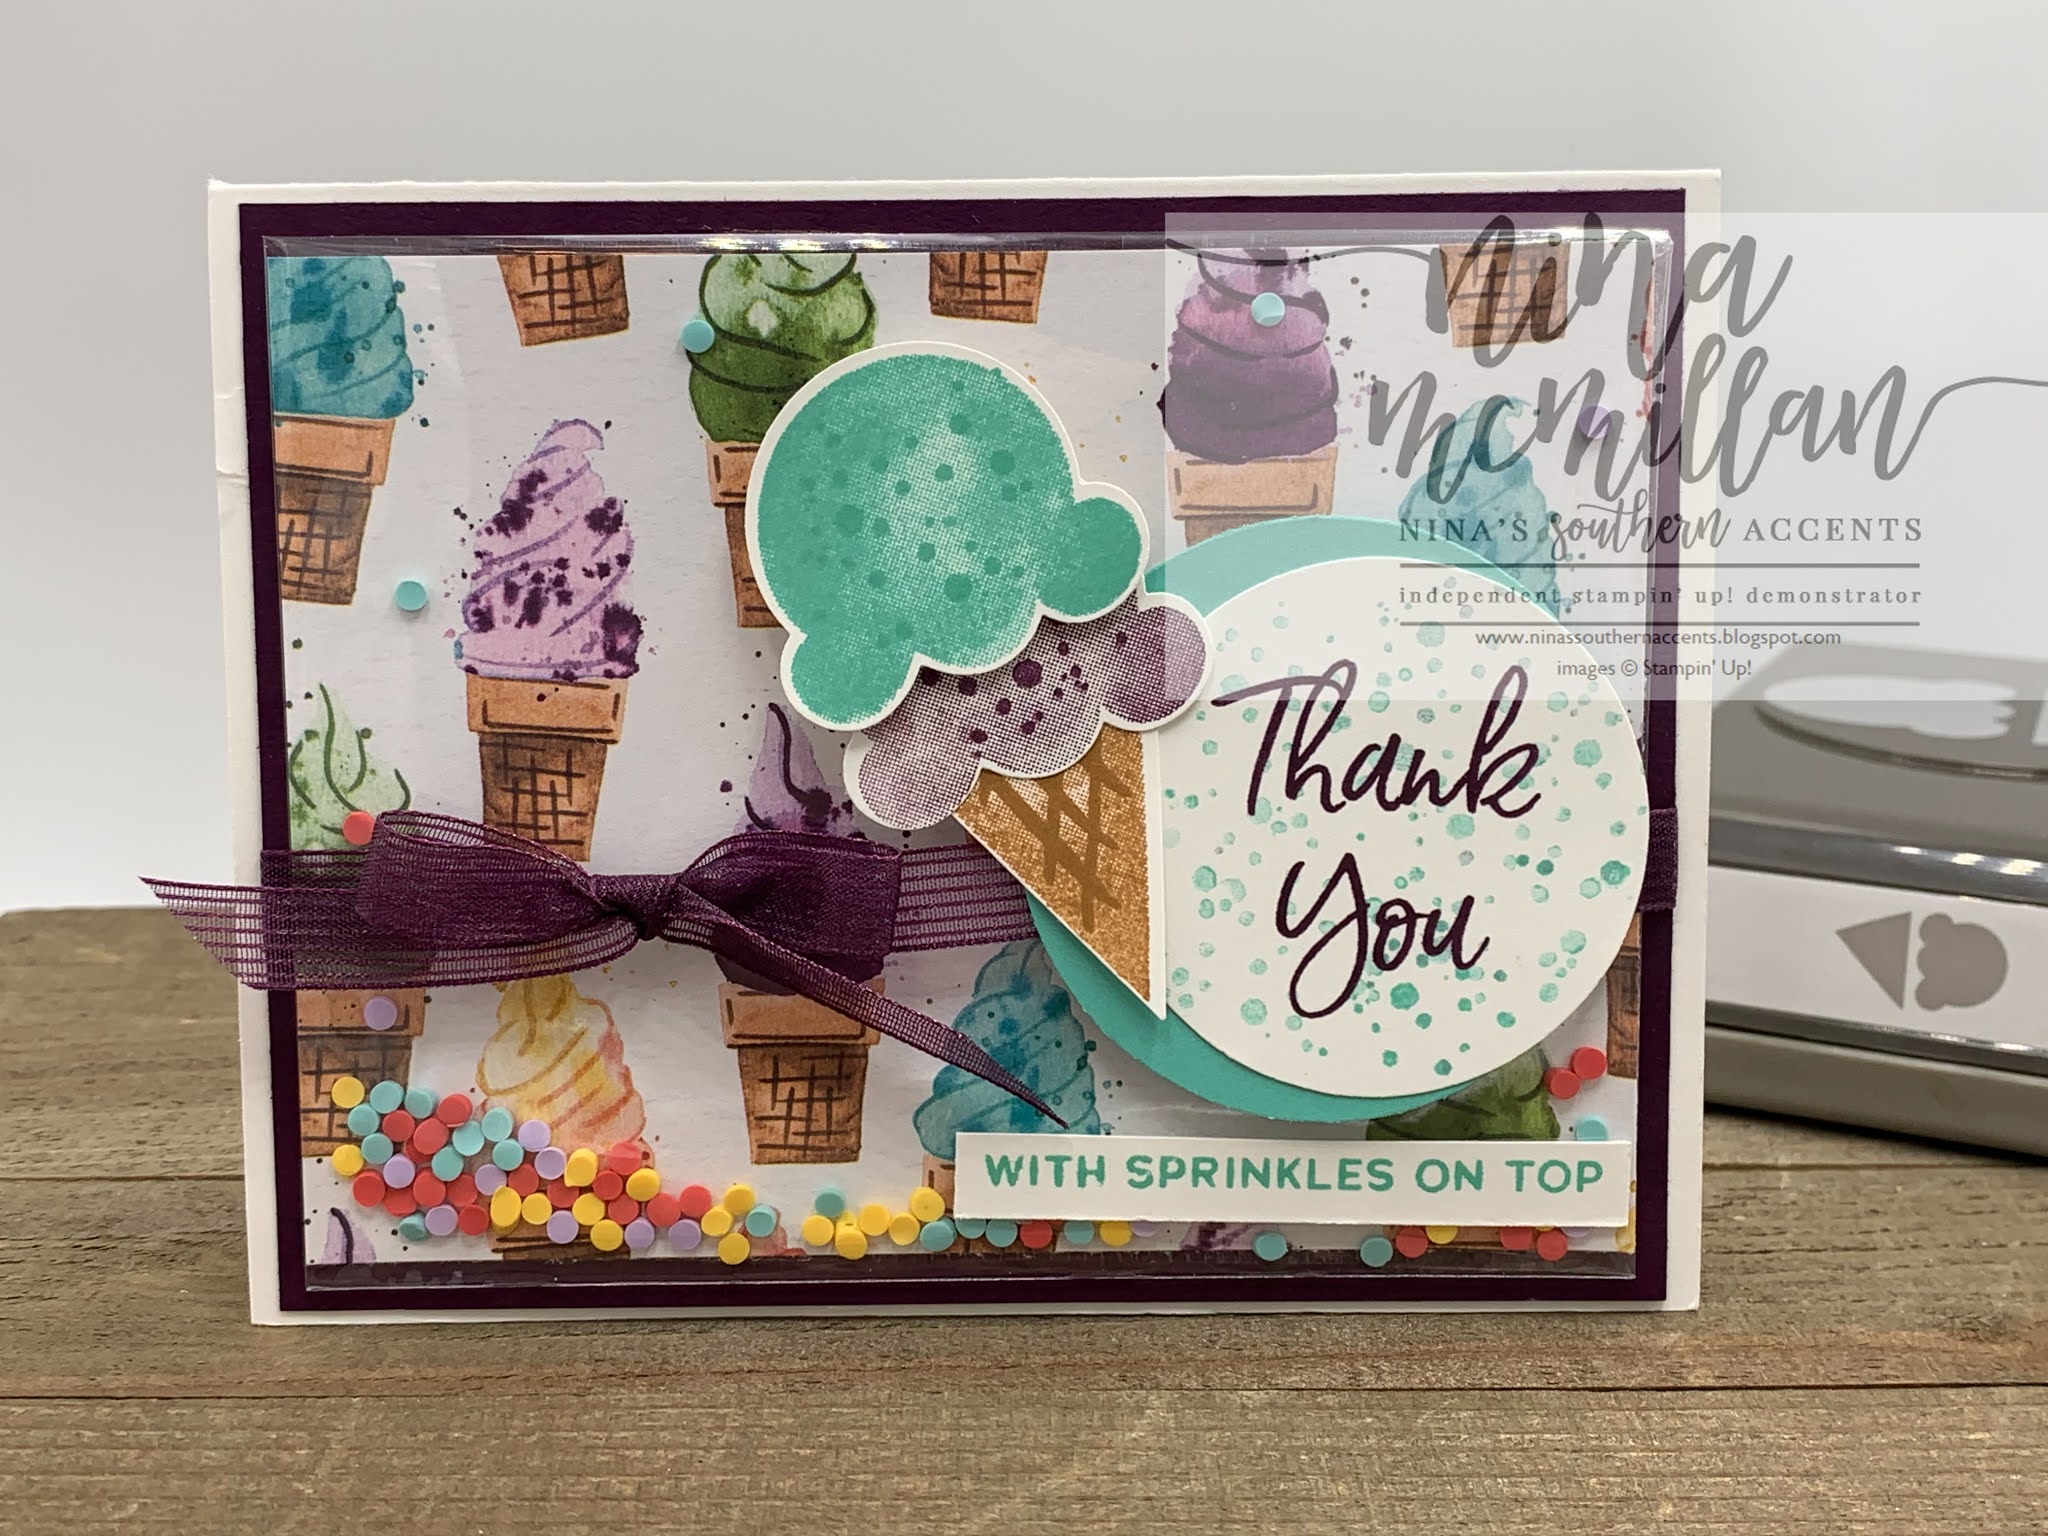
I used a Thick Basic White cardbase cut 5-1/2 x 8-1/2, scored at 4-1/4, then added a Blackberry Bliss layer measuring 4 x 5-1/4. I adhered the shaker element to this layer, then wrapped some of the Blackberry Bliss ribbon around it before attaching to the cardbase. I punched a 2-1/4" Coastal Cabana circle and 2" Basic White that I stamped my sentiment on. I added the ice cream cone I had stamped and punched to finish off the card.

Tip: Create lighter shades of ink from the same ink pad by "stamping off" on a scrap piece of paper before stamping onto your project. This is how I stamped the scoops of ice cream, I stamped off first, then stamped the "dots" full strength.

I CASE'd the idea for this next project from another demonstrator, Breelin Renwick. It was so cute I just had to share the idea.

Mickey and Minnie Ice Cream Bars! 

I used DSP from this suite to create the shorts and bow (the bow is made from 2 die cut hearts from the Stitched Be Mine dies.) I also used one of these dies to create the scalloped edges.

Tip: The Take Your Pick tool was so handy to add those sprinkles! One of the tools in my craft room I wouldn't want to live without!
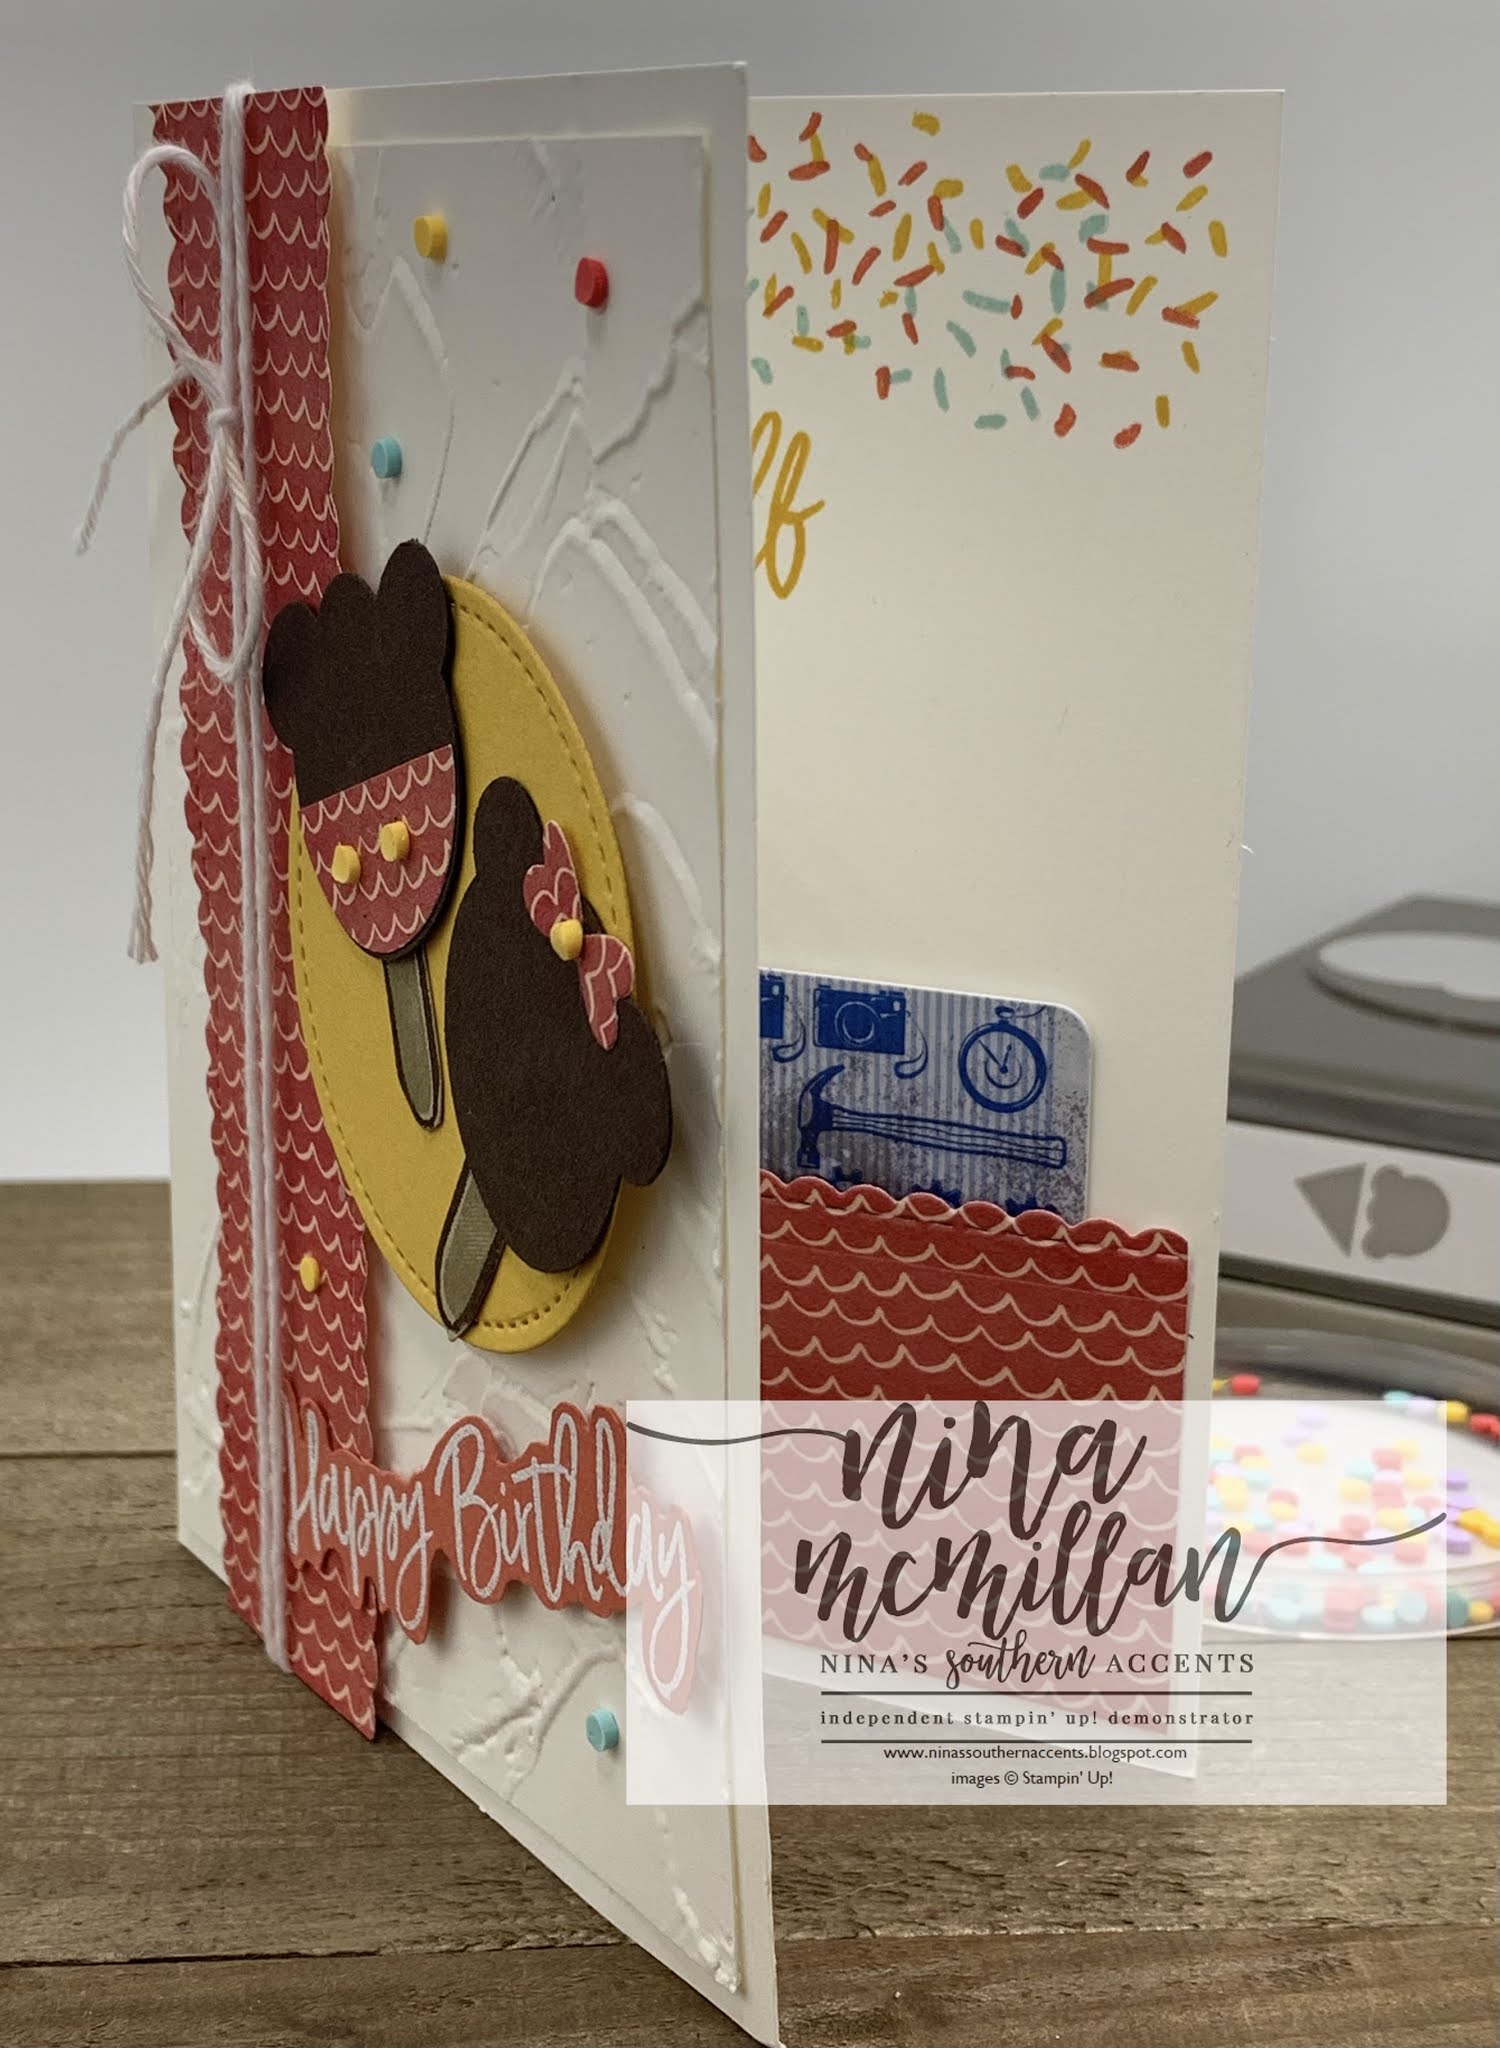

I added a gift card holder to the inside of the card...simply a 4 x 1-3/4 piece of DSP or cardstock and only put adhesive on 3 sides, leaving the top open to slide in a gift card...maybe one from their favorite Ice Cream Shop!


I hope I've given you some fun ideas for using this set, now make sure to hop through and see what everyone else is sharing!


I'm so glad you hopped by today! If you are from the US, don't currently have a Stampin' Up! demonstrator, and would like to purchase any of the products I've used, simply click on the images to go to my online store. I have used several products that are retiring and will no longer be available after May 3 or while supplies last...the Stitched Shapes Dies, the 2 Circle Punches, the Stitched Be Mine dies, and the Terra Cotta Tile cardstock and ink. So if you want these items, order soon so you don't miss out!  
Love,
Nina
Product List

Monday, February 22, 2021

Crafty Challenge Blog Hop-It's a Sketch!


Hey Y'all!
I am so happy to be a part of the Crafty Challenge Blog Hop today. 


The theme is a Sketch Challenge, and this was a fun one.  We could be as strict or as interpretive as we wanted.  I didn't deviate too much. 


I also gave myself a personal challenge...to use a stamp set that I had not used yet.  Do y'all do that? You see something in the new catalog you want, you gotta have it, you order it, and a month later you still haven't inked it up?  That was me with the Ice Cream Corner Suite...I just haven't had a chance to play with it.


But I finally got my chance, and it is so much fun! I love love LOVE the font!  And the DSP is awesome, those bright colors just make me happy!


Since I used the birthday sentiment, I decided to add a gift card holder to the inside of the card, which can be easily done to any card.


Simply add a strip of cardstock (mine here measures 1-1/4 x 4, DSP is 1 x 4).  I used Tear and Tape, and only added it to 3 sides, leaving the top open.


Measurements, Tips & Tricks:
  • Card Base: Bermuda Bay 8-1/2 x 5-1/2, score at 4-1/4
  • Bermuda Bay for inside to make gift card holder 1-1/4 x 4, use scalloped die from Stitched Be Mine to make decorative edge, also use on a strip of Bermuda Bay to make decorative edge on front of card, attach to bottom of DSP
  •  Basic White layer and inside layer 4 x 5-1/4
  • DSP 4 x 1-1/4, inside 1 x 4

  • Let the DSP help you choose your color palette.  This seems like a no brainer, but one thing that I would struggle with was choosing colors that went together.  If it looks good together on the DSP, it's going to look good on your card. One of the best things about Stampin' Up! is how you don't have to think about it, the ink matches the paper, matches the ribbon, etc.  
  • Use Stampin' Blends to alter embellishments like ribbon and rhinestones to create any color, here I colored the rhinestones with my Dark Bermuda Bay 
  • "Stamp off" (ink up stamp and stamp first on a scrap of paper, also called Second Generation stamping) to create lighter colors with the same ink pad. I stamped off the ice cream in Bermuda Bay, then stamped full strength Bermuda Bay for the sprinkles, and did the same with Cinnamon Cider for the Cone.
Time to see what everyone else created!


Just a little less than a week to take advantage of Saleabration and earn FREE products.  If you would like to purchase any of the products I used, click on the images below to go to my online store.  I so appreciate your business!  Make sure to subscribe to my blog, I love sharing creativity!  Thanks for stopping by!
Love,
Nina

Product List