Showing posts with label Fancy Fold. Show all posts

Saturday, November 5, 2022

Stampin For Christmas-Christmas Scottie Pop-Up Card


Hey Yall!
Here we are in November, and only 8 Sundays til Christmas! Who is finished with their Christmas shopping? Not me! Anybody got their tree up? Again, not me! I hope to have everything done the week of Thanksgiving. When do yall decorate?

I'm sharing a Pop-Up card with you today. We made this at one of my card classes, and it looks difficult, but it's really not that difficult. I used the Christmas Scottie bundle, which is a cute set that can be used all year long.


To add interest, I cut off 1" from the front flap, and stamped the "Woof" sentiment along the bottom of the inside piece.  I stamped the plaid image onto a piece of Basic White and cropped it with one of the squares from the Stylish Shapes dies. The Real Red banner piece also was cropped from that die set. I stamped the dog image in Memento (TIP: use your Stamparatus so you can stamp multiple times to get a crisp image), and punched him and the bow with the coordinating punch. I added one of the flat jingle bells and some of the Gingham Black and White ribbon.


Here is the inside! I love how it looks like they are tugging on the ribbon. The dogs were punched from Basic Black cardstock. 


Here is how they pop up. I did not have time to make a video showing how to do this, but Connie Stewart has a great video showing you how to make pop up cards of all shapes and sizes.

Thanks for stopping by today! Now make sure to hop through and see what everyone else is sharing!


Have you seen the kits collection? Here are 2 of the newest, and I am so excited about them both! (Birthday Card Organizer kit available October 4, 2022)
To see all of the available kits, Click here


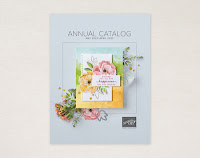
If you live in the US, do not have a current Stampin' Up! Demonstrator, and would like a copy of the catalog, email me at ninassouthernaccents@gmail.com with "Catalog Request" in the subject line, and I will be happy to send you one!


Do you love Stampin' Up! products? Have a long wish list? Become a happy shopper and purchase from yourself at a discount, or even build a business. I would love for you to join my Southern Accents Stampin' Squad, and no! you don't have to have a Southern Accent lol! Click here to sign up.

Love,
Nina


Saturday, October 2, 2021

Oh Deer! Stampin’ For Christmas


Hey Y'all!
Is anyone else like me and saying "Oh Deer! Less than 3 months til Christmas!?" It seems like these months are going by faster and faster. Hopefully you've been following the Stampin' For Christmas Blog Hop since the beginning, so you've gotten lots of inspiration to get you started on those Christmas projects! You probably arrived here from Gez Carpenter's blog, she always has something fabulous to share! Or you may be starting with me, either way, make sure you click on those "next" icons so you hop all the way through and don't miss out on all the beautiful projects everyone is sharing.


My project this month is a Fun-Fold card, one of the simplest to do...it's a Gatefold with a Belly-band. See the instructions below for a great tip on how to make those edges meet!


My card features the Peaceful Deer Bundle and Peaceful Place DSP. I love how it looks with the Cherry Cobbler and Shaded Spruce!


Here is the inside of the card. Now don't think I'm just so extra creative adding that Smokey Slate piece with the sentiment stamped on it....it is actually covering up a place I messed up! But doesn't it look like I planned it to be there....ssshhhhhhh...don't tell and no one will be the wiser! Remember, there are no mistakes in stamping, only embellishment opportunities!


Now it's time to see what Helen Jennings is sharing today! Scroll down to see the measurements and instructions.


Measurements and Instructions:
  • Cardbase-Cherry Cobbler  8-1/2 x 5-1/2. Score on 8-1/2 side @ 2-1/4, fold and burnish. Now, fold over the other side and make the edges touch. Fold and burnish. (This was a game changer for me, I always tried to score both sides, and they would NEVER meet. Here is the solution!)
  • Cut a 4 x 5-1/2 piece of DSP, then cut it into 2 pieces 1-7/8 x 5-1/4. Adhere to 2 front panels of the card.
  • Using the Layering Circle dies, die cut a Cherry Cobbler scalloped circle and a Basic White circle.
  • Stamp the tree images onto the Basic White circle in Shaded Spruce, using the "stamp off" technique to create dimension. Stamp the snowflake image in Smokey Slate.
  • Stamp the deer image onto a piece of Smoky Slate cardstock using Smoky Slate ink. Punch out with the deer punch. Punch the antlers from the Snowy White Velvet.
  • Add color to the deer with the Basic Gray and White watercolor pencils, then go over it with a Wink of Stella brush. Add some wink to the snowflakes, too. You can also tap the brush against the cap to "splash" it all over your piece. Adhere this to the scalloped circle, then pop the deer up with dimensionals.
  • Belly-Band-Basic Gray 8-1/2 x 1, DSP 8 x 1/2. Adhere DSP to Basic Gray. Wrap strip around card with edges in front. Place dimensionals on both edges, and attach the circle.
  • Inside-Basic White 4 x 5-1/4-stamp tree and deer images, add color to deer with watercolor pencil and smooth with Blender pen.
  • Adhere strips of DSP to bottom of card (these are leftover from the pieces cut for the Belly Band and the front panels.


If you would like to order any of the products used, click on the Products Images to go to my online store. Be sure to use the Current Host Code to earn free product from me! 


****New Halloween Tutorial coming soon!*****
Every order in October qualifies for a Halloween Tutorial Bundle!
Thanks for stopping by today, go make something beautiful!
Love,
Nina


Wednesday, September 29, 2021

Drapery Fold Card with Beauty of the Earth Suite


Hey Y'all!
The Fall bug has bitten me! Maybe it has something to do with the gorgeous Beauty of the Earth Suite...that DSP though! I didn't plan this on purpose, but this is my second card in a row created with this suite.


This card features a beautiful Fancy Fold called the "Drapery Fold." I was inspired by a fellow demonstrator, Diane Evans, her blog is Stampin With Diane. 


To create the fold, you need a 3-1/2 x 8 piece of DSP. You will score it at 2, 3, 5, & 6. Place the DSP in your trimmer at a diagonal with the bottom of the 2 inch score mark in the track of the blade, and the opposite top corner, cut at a diagonal. I used the leftover piece to punch the oval and for the piece on the inside of the card. Fold on the score lines in an accordian
fold and adhere the folds.


Emboss a Copper Foil panel (4x5-1/4) with the Bark embossing folder, adhere the DSP, and wrap a 5" (approximate) length of ribbon across the top of the DSP. I adhered it to the back with just plain clear tape. Adhere this to a Misty Moonlight cardbase, add a Basic White inside panel (4x5-1/4). I stamped a tree from the stamp set, and I love how you can get the fall leaf color using sponge daubers! To achieve this look, ink up the leaf stamp in Bumblebee, the ink a sponge dauber in Cajun Craze and randomly "daub" it over the stamp, then stamp on the cardstock. I heat embossed the sentiment and cropped it with one of the dies from the set. I finished it off with some of the Brushed Metallic Adhesive Backed Dots. I really have "fall"en in love with this Suite! I hope you are inspired too!

ONLY 2 DAYS LEFT OF SALEABRATION!!! FREE PRODUCT WITH $50 OR $100 PURCHASE!

If you would like to order any of the products used, click on the Products Images to go to my online store. Be sure to use the Current Host Code to earn free product from me! 


Every order in September qualifies for this One Sheet Wonder tutorial bundle 24 project tutorials!
Thanks for stopping by today, go make something beautiful!
Love,
Nina