
Who doesn't love free stuff! And there are so many pretties to choose from! Click here to start shopping!

It's a great time to join my team-the Southern Accents Stampin' Squad, SASS for short. Click "Join the Fun" at the top for more information!
Hey Y'all!
I wanted to share some cards I made with one of my favorite bundle in the January-April Mini Catalog-the Share A Milkshake Bundle. Maybe it's because a milkshake is one of my favorite treats, maybe it's the cute, cute font, or the fun dies....I don't know. But I have had lots of fun creating cards with it.

This first card is an "almost" simple stamping card. It is just stamps, ink, and paper except for that die cut cherry popped up on top of the milkshake. I needed a bunch of thank you cards, so I used our Notecards and Envelopes, got out my Stamparatus, and went to work. The Stamparatus was the secret to lining up the two-step stamps for the milkshake glass and topping perfectly, and then cranking these out quickly. I came back and stamped the straw, sentiment, and those cute hearts using my blocks. And Voila! Twenty thank you's in no time!

This next card is a result of dropping one of the Thank You notes in an ink pad....UGGGGHHHHH!!! Does that ever happen to y'all? Thank goodness it was the inside of the card. It just fell pretty as you please right on top of my Sweet Sorbet! So I used just the card front and stepped things up. (PS see that cute little Boho Blue Mini Cut & Emboss up there in the corner? You can have your own when you join my team as a Demonstrator! Only a couple of weeks left to take advantage of this awesome opportunity!)

I used the Country Gingham DSP to die cut those stinkin' cute hearts and the lattice die. I also added a strip for the background. Did I mention I was away from my craft room and was working with limited supplies? I wanted some more texture, so I added score lines with my paper trimmer. I also had not planned to make any regular sized cards, just use the notecards and keep it simple. I just so happened to have some Blushing Bride cardstock I had brought to use on some other projects, and I really like how it coordinated with the colors I used.

I needed to make a gift card holder, and had planned to do that at another time, but then I thought, "Why not use this one?" You can make any card a gift card holder easy peasy-just add a strip of DSP or even cardstock along the bottom of the inside panel and only adhere three of the sides, leave the top open. Here I added another strip of the Country Gingham DSP. See that little thumb notch? I used one of the dies from the bundle to create that! I just had to add that little heart I had left over.
I hope these cards have sparked your creativity. You can purchase the Share A Milkshake Bundle from my online store, just click the link at the top of the page. It would be a great bundle to add to your Starter Kit when you sign up as a demonstrator...just sayin'! I would love to have you on my team!

Have you seen the kits collection? Here is one of my favorites-ANYTHING to help me organize! And I am promising to be better about sending cards in the New Year, so I know this is going to be a huge help.
To see all of the available kits, Click here
If you live in the US, do not have a current Stampin' Up! Demonstrator, and would like a copy of the catalog, email me at ninassouthernaccents@gmail.com with "Catalog Request" in the subject line, and I will be happy to send you one!
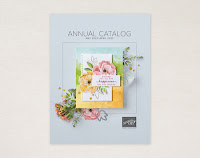
Available Now!
Email me at ninassouthernaccents@gmail.com with "Catalog Request" in the subject line to request a current catalog, or click on the image to view online.


Do you love Stampin' Up! products? Have a long wish list? Become a happy shopper and purchase from yourself at a discount, or even build a business. I would love for you to join my Southern Accents Stampin' Squad, and no! you don't have to have a Southern Accent lol! Click here to sign up.
Love,
Nina
No comments:
Post a Comment