Showing posts with label #simplestamping. Show all posts

Friday, June 11, 2021

Sweet and Simple Cards

Hey Y'all!
You know we all love those "all out" cards that have all kinds of layers and embellishments, fancy techniques, etc.  But, if you are a beginning stamper, that can be overwhelming. And then sometimes we need a quick card in a pinch.  I have started a monthly class called "Sweet and Simple Cards" that is great for beginners, or just those that have limited time but want to get that "crafting fix."  
Funny story: when I planned this class, I planned 2 cards for $10, thinking 1 hour-1-1/2 hours.  We were finished in less than 45 minutes!  I've decided in future classes to do 3 cards for $12, just to make it worthwhile for people to come to my house! Which, it is always worthwhile because you get to see me, right? lol!

The first card we made used the beautiful Hydrangea Hill DSP, which is, sadly, retiring at the end of the month.  This particular pattern is perfect to make a set of cards, just cut the 12x12 sheet into 6 4x5-1/4 pieces. I used a Basic White cardbase (8-1/2 x -5-1/2, scored at 4-1/4), and the Misty Moonlight layer (4-1/8x5-3/8). I stamped the sentiment directly onto the DSP (yes! you can do that!) in Misty Moonlight ink. I added some Linen Thread, and there you go! This is one of the most basic card layouts. If your DSP is too busy or dark to stamp on, you can modify this by stamping onto another piece of cardstock, Basic White or another coordinating color and adhere it on top of the DSP. This would be considered a "SIP" card (minus the Linen Thread)....Stamps, Ink, and Paper.


This next card also used a fun layout that can be reproduced with any DSP. The top card was my sample, and the bottom card is the one I made in class, showing them how to achieve a totally different look just by flipping the DSP.  This is a Crumb Cake cardbase and the DSP is 2-1/4 x 5-1/2, and 1/2 x 5-1/2. To simplify, cut your DSP 2-3/4 x 5-1/2, then trim 1/2 off. We stamped the large daisy image from Daisy Lane twice in Flirty Flamingo and used the Daisy Punch to punch them out, then offset them and glued together. We used the Sprig Punch to punch some Granny Apple Green and attached behind the Daisy. Stamp the "Smile" sentiment and that's it! 
See! Cardmaking can be so simple and fun! I hope today's post has inspired you to grab your supplies and get creative....go make somebody smile...if you're like me, that somebody is you when you create something beautiful. Then you get to send that card and double that smile!


If you would like to order any of the products used, click on the Products Images to go to my online store. Be sure to use the Current Host Code to earn free product from me! Host your own party and earn extra rewards now through June 14!

Receive this FREE Tutorial Bundle with 30 Fancy Fold Card Tutorials when you place an order with me in June.


Love Stampin' Up! products? Join my team, become a demonstrator and get them at a discount! Click "Join My Team" at the top of the page to find out more info!
Happy Stamping!
Love,
Nina


Saturday, April 17, 2021

Tools of the Trade: Paper Trimmer, Snips, Bone Folder, Grid Paper

 Hey Y'all!

I am starting a new series called Tools of the Trade, and I will be featuring tools we use in Papercrafting. I will demonstrate them and give you some tips and tricks to help you make stunning cards that will WOW those you give them to.

For this first post in the series, I am focusing on 4 tools: the Paper Trimmer, Bone Folder, Snips, and Grid Paper.  To make great cards, you need a great paper cutter. I love the Stampin' Up! paper trimmer because it has a cutting blade and a scoring blade, and it is easy to read. Watch the FB live video to see how easy it is to cut panels for your cards and how the other tools make crafting so much easier!


And here is the card I made in the video:

Measurements:
  • Basic White Thick Card Base 8-1/2 x 5-1/2, scored at 4-1/4
  • Misty Moonlight Panel 4-1/8 x 5-3/8
  • Hydrangea Hill DSP (Designer Series Paper) 4 x 5-1/4
Look for this series every Saturday! Be sure to subscribe to my blog so you don't miss any inspiration. Also, connect with me on FB and Instagram. If you would like to order any of the products I've used, click on the images below to go to my online store.  Anyone who orders in the month of April 2021 will receive this awesome Mini Album Tutorial Bundle with 18 tutorials! 

Thanks for stopping by, go create something beautiful to share!
Love,
Nina


Friday, January 31, 2020

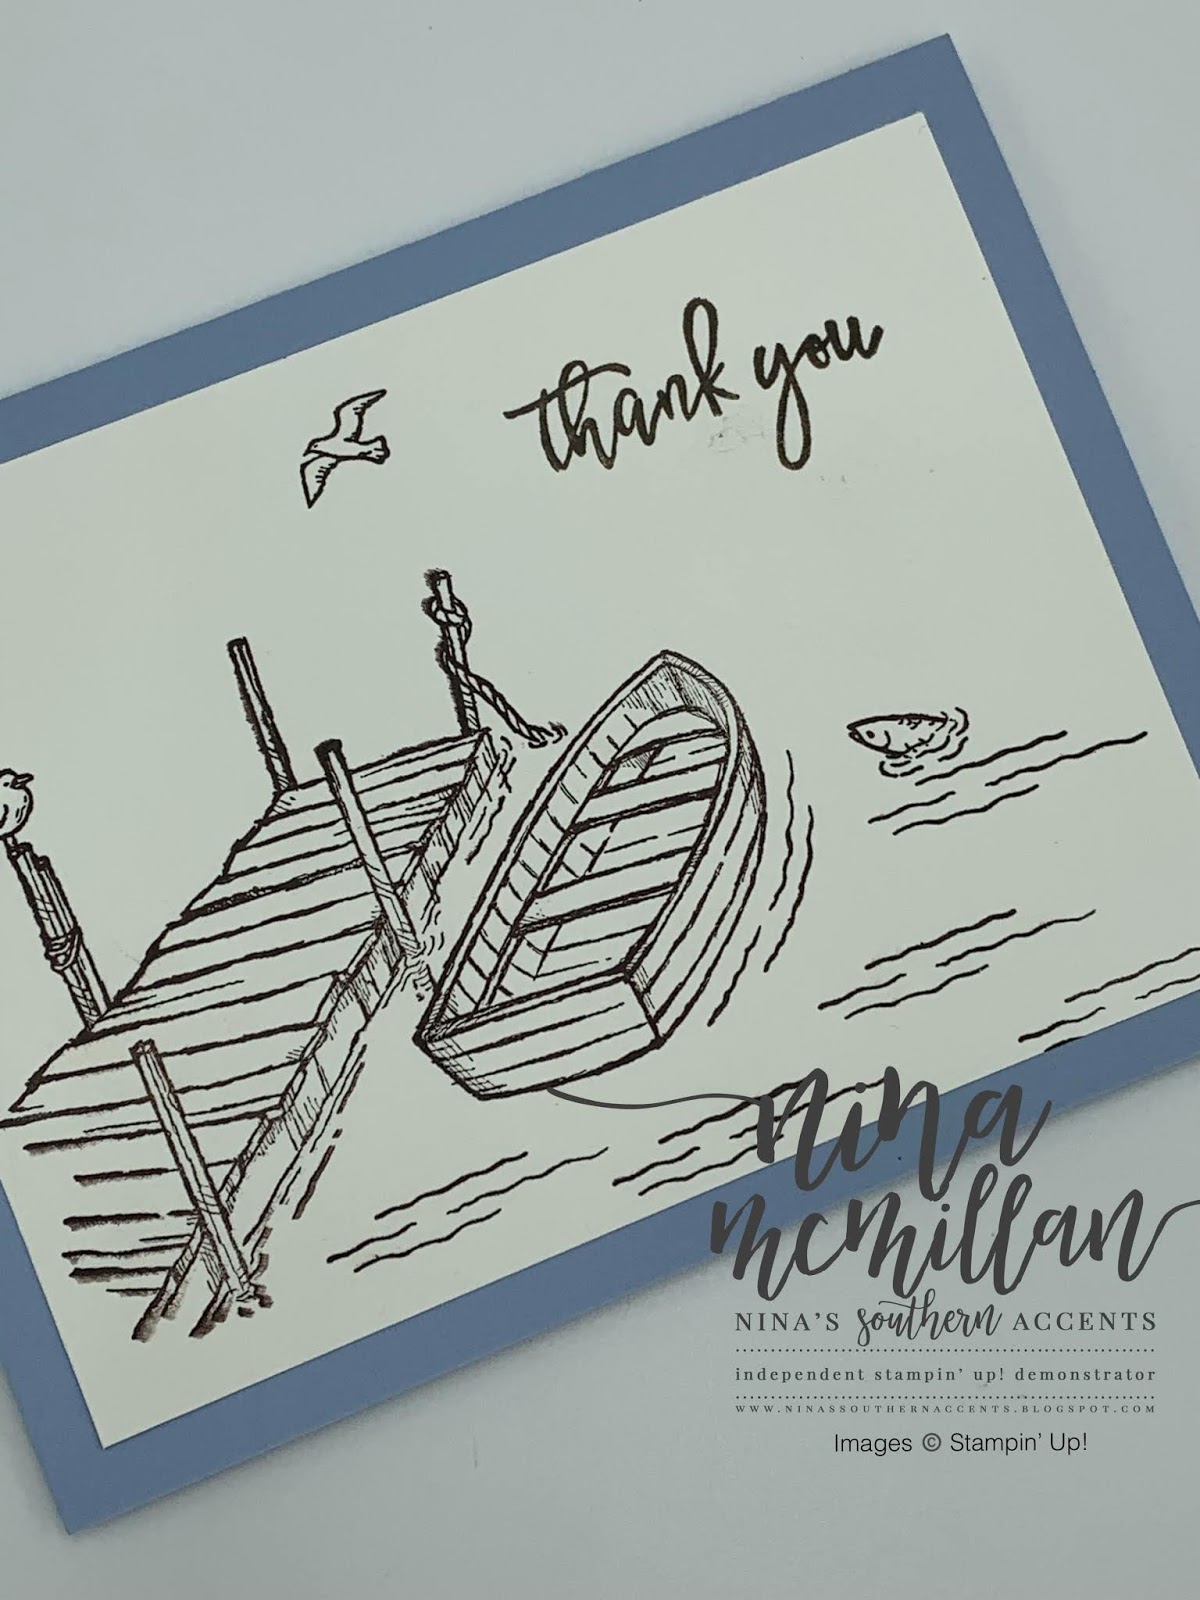
Make It In Minutes with By The Dock

Hey Y’all!
Here is another Make It In Minutes project. I just love doing these. This card uses just one ink color, actually it’s a #simplestamping project.  And the stamp set is one of my favorites from the new 2020 Mini Catalog.  It can be purchased as a bundle with coordinating dies, but today, I just used the stamp set.
I stamped the images in Early Espresso onto a 5 x 3-3/4 Whisper White panel.  I love that fish peeking out of the water!

The "Thank You" sentiment did come from the stamp set, I just didn't ink up the rest of the stamp.  To achieve this, I used my Stamparatus and the Early Espresso Stampin' Write Marker.  I inked up only the part of the sentiment I wanted, making sure to use the side, not the tip, of my marker.  I used the Stamparatus just in case I didn't get a good image the first time and needed to re-stamp.  I adhered the panel to a Seaside Spray card base ( 5-1/2 x 8-1/2, scored at 4-14).  I needed a masculine thank you card, and this turned out perfect!
If you would like to order any of the supplies I used, simply click on the images below to go to my online store.  I would very much appreciate your business.  Also, it's Saleabration time, so you can earn FREE products with qualifying purchases of $50 or $100.  Please use the current host code found in the right hand column.  I have a Loyalty Customer Reward program that let's you earn free product with your purchases.  
Thanks for stopping by today!  
Love,
Nina


Product List