Showing posts with label Treat Holder. Show all posts

Sunday, June 23, 2024

Country Birdhouse Treat Holder


Hey Y'all!
If I had to pick a favorite in the new Annual Catalog, it would be the Country Woods Suite Collextion. There are 2 awesome bundles, an Embossing Folder, ribbons, and 2 sets of gorgeous Designer Series Paper. I used the Country Birdhouse Bundle, Country Woods DSP, and the ribbon to create this 3D Birdhouse Treat Holder.

I just love 3D projects! Yesterday was Stampin' Up's event, Creativity Now, an online event for Demonstrators. We were able to preorder a suite of products from the upcoming July-December Mini Catalog, create projects using it, and preview some new products and see behind the scenes how some of them were designed. My team and I gathered for the event, and, because we are crazy like that, we also designed project to make. Because you can NEVER craft too much lol! Watch for a post about Creativity Now and the projects we made. But I just had to share the one I designed because I love how cute it turned out!
Shout out to Julie Gilson (Stampin' Gala) for the box measurements. Once you die cut all the pieces, it is very simple to put together. 


See how the back of the box looks like wood grain? This look can be achieved by dragging and ink pad (we used a Stampin' Spot) across the paper. If you are like me and love the wood grain look, you can create your own using this method. 
Thanks for stopping by today! If you would like a project sheet to make this, email me at ninassouthernaccents@gmail.com with "Birdhouse Project Sheet" in the subject line, and I will send it to you. 
PS: Bundles are on sale, so if you love this bundle, snag it while it's on sale! (Sale ends June 30, 2024) Click the image to go to my online store!


Have you seen the new In Colors? Which one is your favorite? I see alot of Summer Splash in my future projects! Join my In Color Club to receive new In Color products each month for five months-ink pads, refills, cardstock, ribbon, DSP, blends, markers, and embellishments! 


Did you know???????


Some products are exclusively online and won't be seen in the catalog. Make sure you check them out in my Online Store


                                          Have you seen the kits collection?
To see all of the available kits, Click here


Coming Soon!


If you live in the US, do not currently have a Stampin' Up! Demonstrator, and would like a catalog, email me at ninassouthernaccents@gmail.com with Catalog Request in the subject line to receive a copy from me. There will be a $5 fee, but you will receive a coupon for $10 off your first order.  If you have placed an order within the last 12 months, you will receive a free copy. 


Email me at ninassouthernaccents@gmail.com with "Catalog Request" in the subject line to request a current catalog, or click on the image to view online.


Do you love Stampin' Up! products? Have a long wish list? Become a happy shopper and purchase from yourself at a discount, or even build a business. I would love for you to join my Southern Accents Stampin' Squad, and no! you don't have to have a Southern Accent lol! Click here to sign up.


TAMS


Thanks for stopping by today, go make something beautiful!
Love,
Nina


Saturday, September 4, 2021

Pretty Pillowbox Purse-Stampin' For Christmas Blog Hop


Hey Y'all!
Do you believe we are almost 3 months away from Christmas! When we started this hop, it seemed like Christmas was so far away. But boy, does time fly! If you are joining me from Stefanie Pletscher's blog, or starting with me, Welcome! I am so glad you are her.  For my project this month,  I am sharing a treat holder made with one of my favorite products from the July-December Mini Catalog, the Pretty Pillowbox Dies.


I also decided to feature 2 Saleabration items, the Peaceful Prints DSP (which coordinates with the Peaceful Deer Bundle), and the Be Dazzling glittery specialty paper. Both of these products are Level 1 items-they can be earned with a $50 purchase, and only until the end of September, so hurry if you want them!


The original idea for the purse came from Chris Slogar at Buckeye Inklings. To make the pillowbox into a purse, you will need to add 2 score lines.  I have marked the 6 inch score line on my Simply Scored Scoring Tool with a black permanent marker. This makes it easy to see when you need to do diagonal scoring or for times like this. Line up the original score line on this mark, and score 1/4 inch on either side.


Next, cut up those score lines to the score lines that make the folded ends of the box. Do not cut these tabs off, they will just fold up inside the box.


Place adhesive (I used Tear and Tape) as shown. Fold and burnish all of the score lines. 


Punch small holes at the top score line where the flap folds over. (This is a photo from another one I made, I forgot to photograph this step. Did I mention we are going camping this weekend and I was trying to hurry and get this finished before we left? But I didn’t, so I am having to finish this post in the vehicle. Isn’t life fun😂)
   Thread a 6-8” length of ribbon through the holes, and tie a knot in each end. I used Velcro dots to create the closure for the flap.


Now it’s time to embellish! I die cut 2 of the flowers from the dies and adhered them together. I heat embossed the sentiment in gold, then used the label die to crop it. I punched a hole and tied it on with Baker’s twine.

This treat holder will hold all kinds of things…I put Hershey’s Nuggets in this one. I love how you can wrap them with DSP to coordinate with your project! Just cut a 1x3 strip, attach it with a glue dot to the bottom of the candy, wrap around, and attach with another glue dot.
These would be easy to make up ahead of time and store flat until you are ready to put them together. They make great stocking stuffers or table favors.
Your next stop is with the fabulous Gez Carpenter. Make sure to hop all the way through so you don’t miss any inspiration! 

Remember Saleabration is happening now through the end of September-every $50 or $100 purchase gets you a free product! If you would like to order any of the products used, click on the Products Images to go to my online store. Be sure to use the Current Host Code to earn free product from me! 

Product List

Everyone who orders in September will receive this One Sheet Wonder Tutorial  with 24 tutorials from demonstrators all over the globe!
Go make something beautiful today!

Love,
Nina


Thursday, March 11, 2021

Stampin' Dreams Blog Hop-Anything But A Card!


Hey Y'all!
It's time for another Stampin' Dreams Blog Hop! This month, our theme is "Anything But A Card." Cards are fun to make and give, but give me something with chocolate in it, and I am your friend for life.  Bonus if it has coffee, too...but I digress.


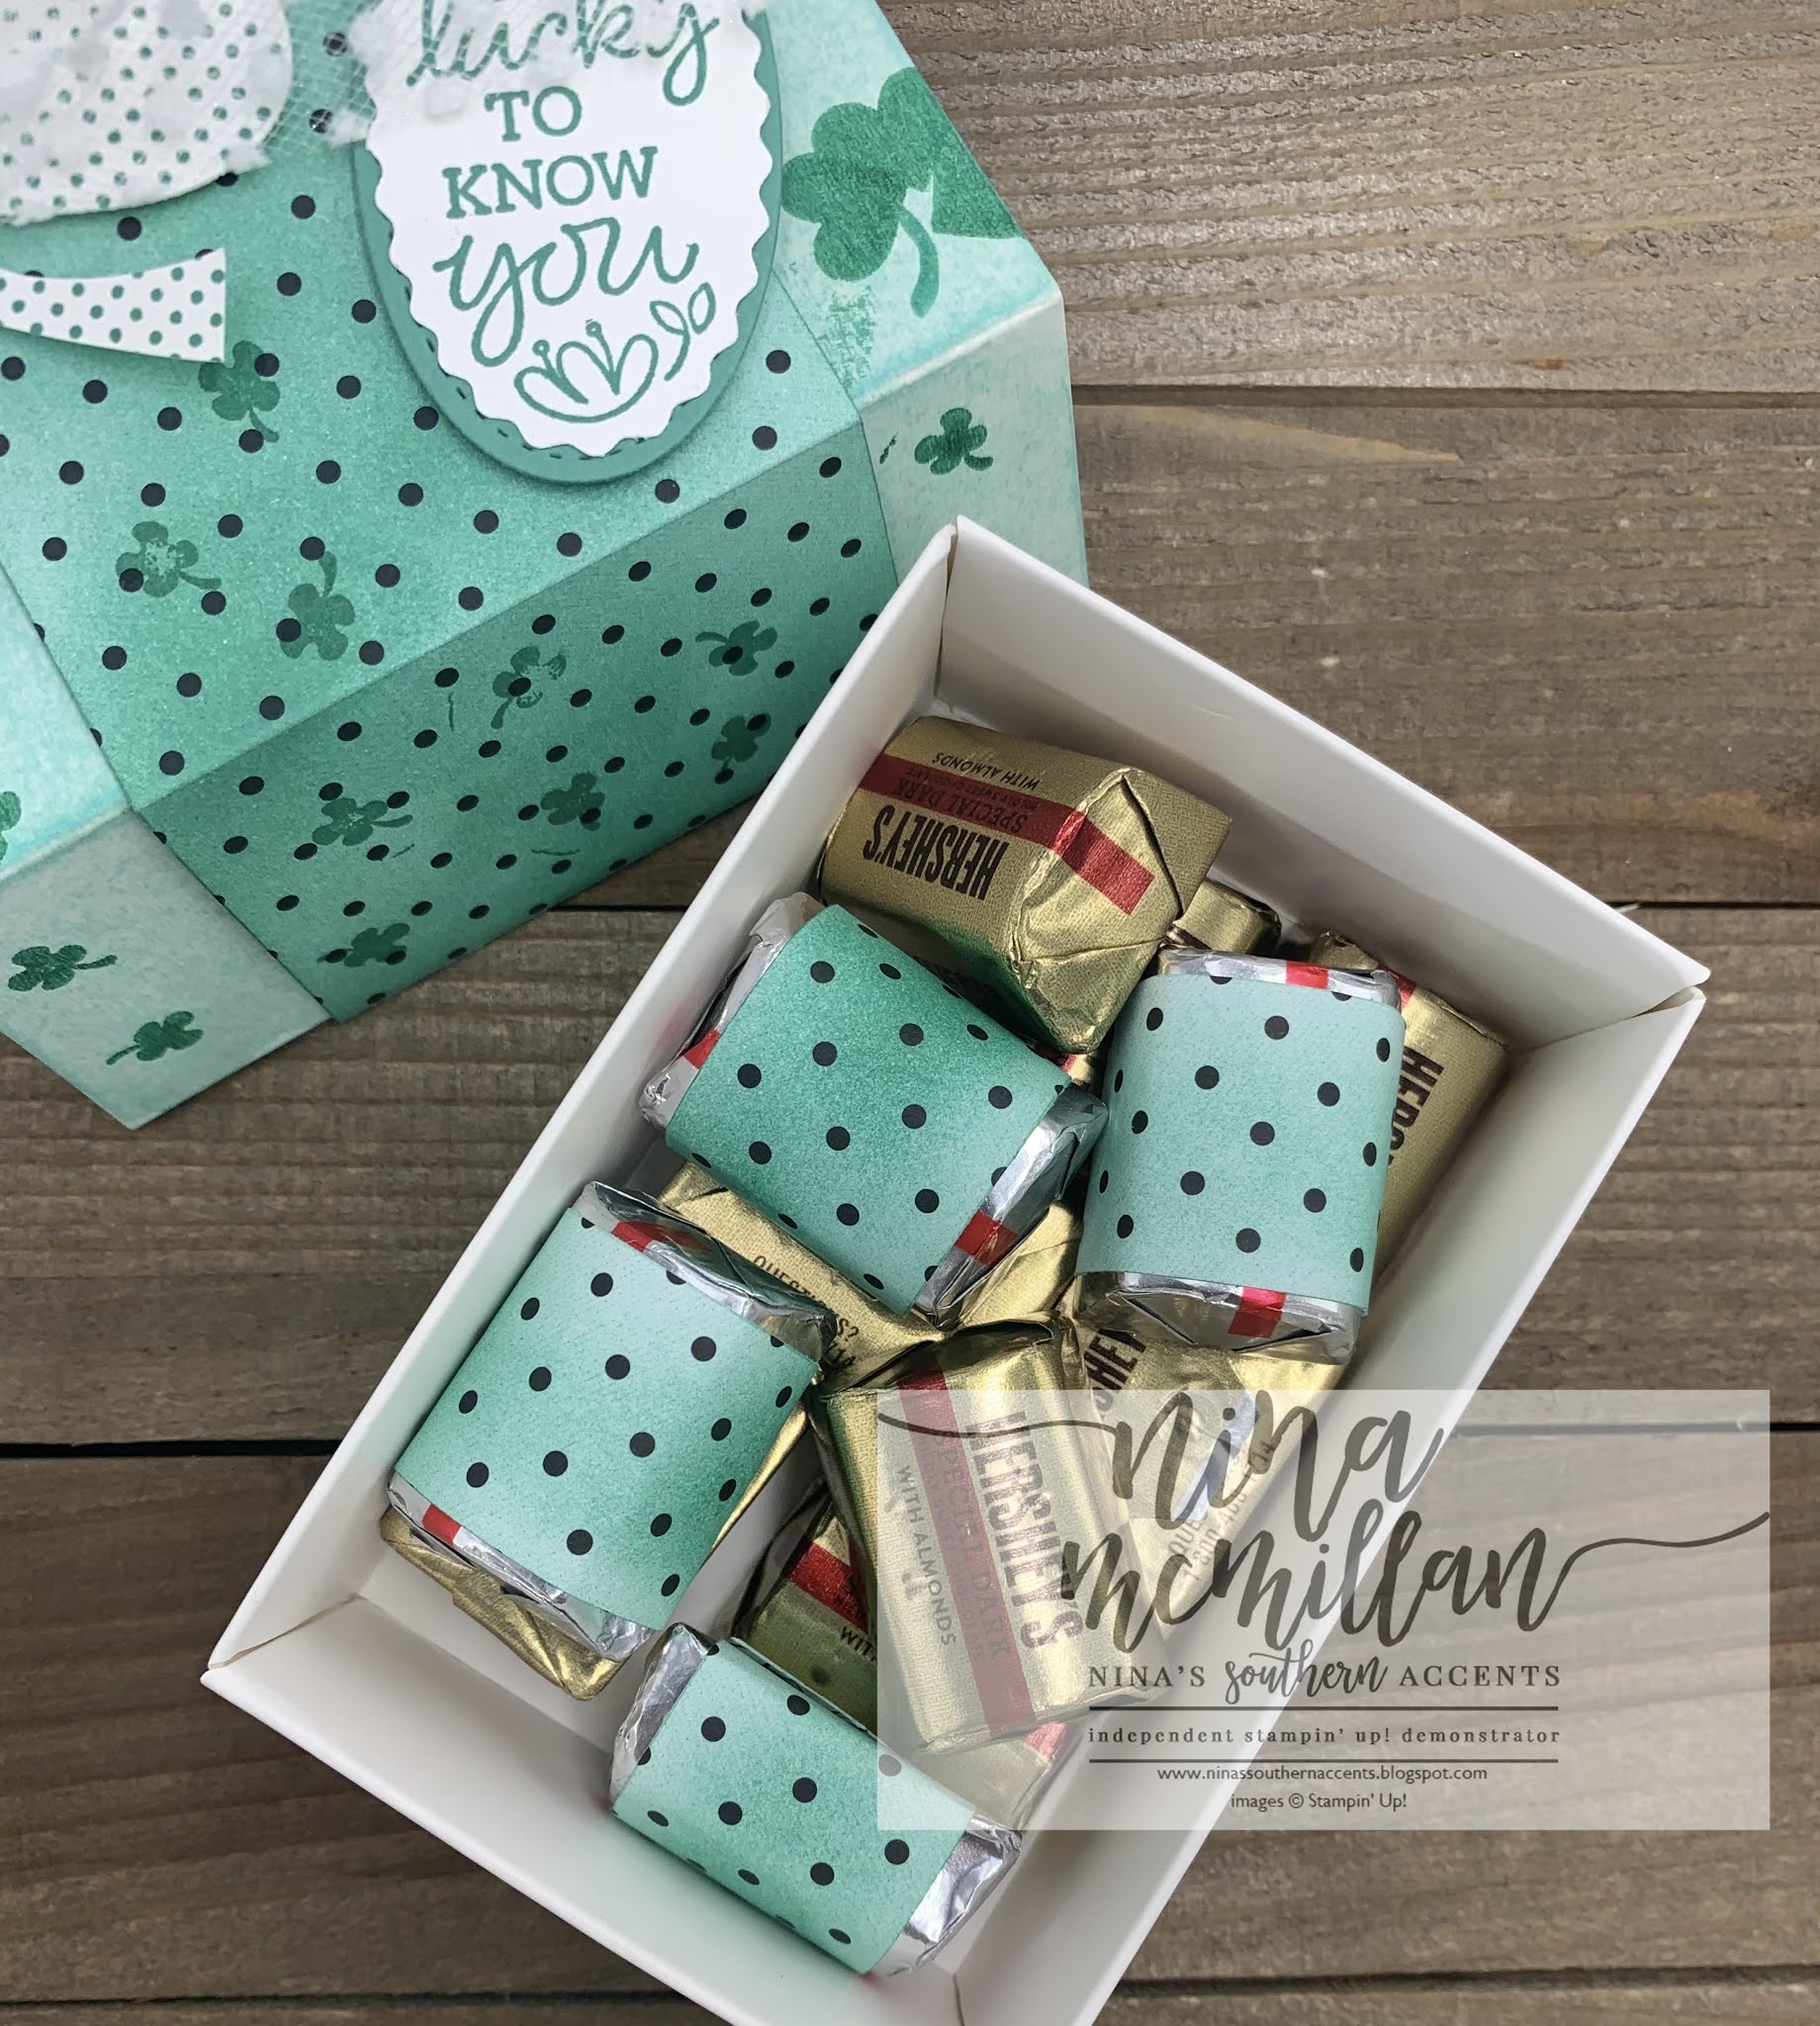
St. Patrick's Day is coming up, so I decided to embellish one of  the Love You Always Treat Boxes.  I used the hearts from the Lots of Heart bundle to make shamrocks.  I was going through my stamps looking for an appropriate saying, because I didn't think I had anything current that would work for St. Patrick's Day, when I realized the Oval Occasions bundle has a tiny shamrock and the "So lucky to know you" sentiment. Winning! I need to pay more attention to what stamps I have! 

But, if you don't have a set with a shamrock, 3 hearts make a great one!  I just cut the stem freehand.  Since I started with the DSP that had polka-dots, I had to keep the theme going! I used the polka-dot heart stamp for the shamrock and the polka-dot tulle ribbon.


I first altered the box itself by spritzing it with Just Jade re-inker mixed with 70% alcohol.  ***Note: the boxes have a waxy coating that doesn't allow the ink to absorb right away, and it tends to run.  But the alcohol allows it to dry fairly quickly. I also stamped it with the tiny shamrock from Oval Occasions, and made the larger shamrock with the small heart stamp from Lots of Heart.  I used the Just Jade Stampin' Write Marker to draw in the stem.


I also altered the DSP with a Blending Brush, and stamped the belly band with the tiny shamrock.


Back to the chocolate...what else would you put in a St. Patrick's Day gift but nuggets of gold...Hershey's nuggets that is! I wrapped a few with the altered DSP.  


Measurements:
  • Belly Band-10 x 2-1/2
  • Nugget Wraps- 1 x 3
Now it's time to see what everyone else made!


If you would like to order any of the products I've used, just click on the images below to go to my online store.  Be sure to used the current host code to earn free product from me.  Thanks for stopping by!
Love,
Nina


Product List